To pass parameters from Maven project using JMeter Maven plugin, please make sure you have Maven project created and udated JMX placed at src/test/jmeter source folder. If not please first setup your project Running JMeter Script from Eclipse in Maven project


Parameterize JMeter Script
Update JMeter Script
- Please make sure that you have created variables in the script as shown in below example.This example uses Number of Threads, Ramp-Up Period and Duration as variables for reference. Default value is set as 1 for each variable Number of Threads, Ramp-Up Period and Duration.

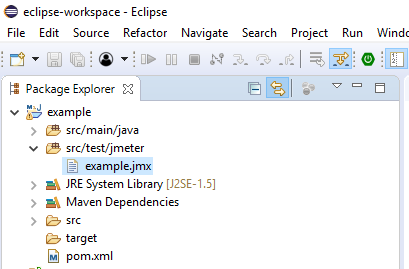
Import JMeter Script
- Import the Parameterized script (.jmx) in eclipse under src/test/jmeter

Update POM.xml
- Add Parameters Configuration in POM.xml
<configuration>
    <testResultsTimestamp>false</testResultsTimestamp>
    <propertiesUser>
        <threads>${threadCount}</threads>
        <rampup>${rampupTime}</rampup>
        <duration>${durationSecond}</duration>
    </propertiesUser>
</configuration>
- Complete POM.xml will look like this
<project
    xmlns="http://maven.apache.org/POM/4.0.0"
    xmlns:xsi="http://www.w3.org/2001/XMLSchema-instance"
 xsi:schemaLocation="http://maven.apache.org/POM/4.0.0 http://maven.apache.org/xsd/maven-4.0.0.xsd">
    <modelVersion>4.0.0</modelVersion>
    <groupId>example</groupId>
    <artifactId>example</artifactId>
    <version>0.0.1-SNAPSHOT</version>
    <packaging>jar</packaging>
    <name>example</name>
    <url>http://maven.apache.org</url>
    <properties>
        <project.build.sourceEncoding>UTF-8</project.build.sourceEncoding>
    </properties>
    <dependencies>
        <dependency>
            <groupId>junit</groupId>
            <artifactId>junit</artifactId>
            <version>3.8.1</version>
            <scope>test</scope>
        </dependency>
    </dependencies>
    <build>
        <plugins>
            <plugin>
                <groupId>com.lazerycode.jmeter</groupId>
                <artifactId>jmeter-maven-plugin</artifactId>
                <version>2.1.0</version>
                <configuration>
                    <testResultsTimestamp>false</testResultsTimestamp>
                    <propertiesUser>
                        <threads>${threadCount}</threads>
                        <rampup>${rampupTime}</rampup>
                        <duration>${durationSecond}</duration>
                    </propertiesUser>
                </configuration>
                <executions>
                    <execution>
                        <id>jmeter-tests</id>
                        <phase>verify</phase>
                        <goals>
                            <goal>jmeter</goal>
                        </goals>
                    </execution>
                </executions>
            </plugin>
        </plugins>
    </build>
</project>
Script Execution
- Pass values as command line parameters
mvn verify -DthreadCount=20 -DrampupTime=5 -DdurationSecond=60